by Carl L. Rosner
New Jersey, USA
|
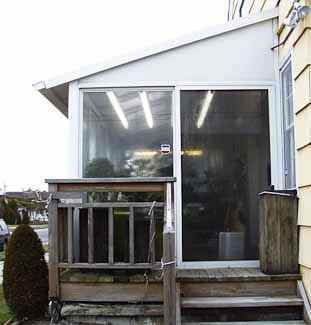
Introduction I grow plants in a greenhouse that was modified from an existing deck. If I had to do it all over again, I would not have enclosed my deck, but would have contacted a place like Charlies Greenhouse, www.charliesgreenhouse.com and ordered a greenhouse that would fit on my existing deck, with all the bell and whistles, such as thermostatically controlled windows, fans and heaters. But, it is too late to consider and a lot of water and time has passed over the dam. In the years prior to building my greenhouse, I tried my luck raising about 40 bonsai in my living room.
The plants were growing under fluorescent lights and in a window with Southern exposure; but even so, the trees were “just surviving” and not really growing or maturing as I had hoped. That’s when I decided that a better method had to be found. There was an eight by fifteen-foot wooden deck attached to our home, which my daughters used to sun bathe, but they are long gone from our home. With my wife’s blessing, I had the deck enclosed by a patio builder. On the south side, and the front entrance, I had installed a sliding four-foot wide by eight-foot tall door, plus the same size window.
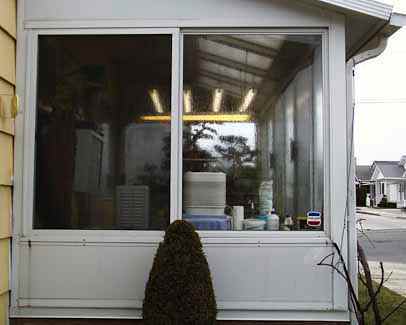
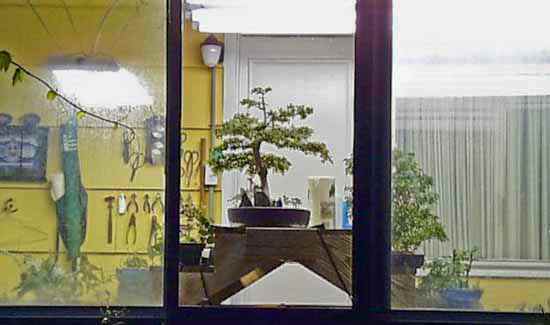
On the north side, I had installed a four-foot sliding window and a stationary window shown below.
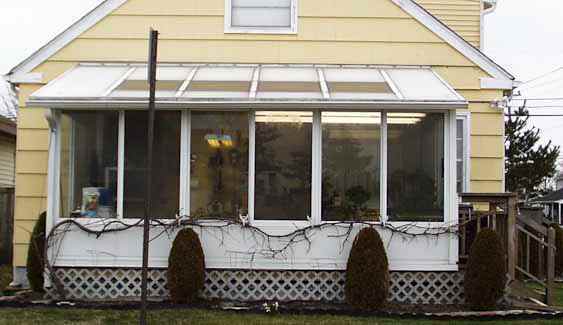
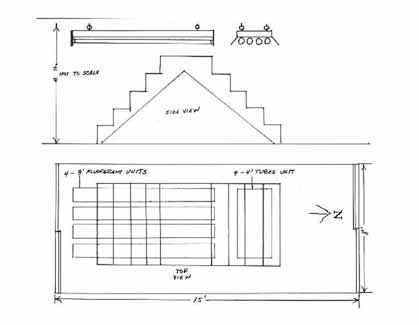
The windows were about five feet tall with a supporting wall height of 21 inches from the floor. On the west side there were six windows, three sliding and three stationary windows. They made up the total fifteen feet of length, and were mounted on top of the 21-inch wall.
The slanting roof has four skylights installed to give the plants extra light from above in addition to light entering from the windows.
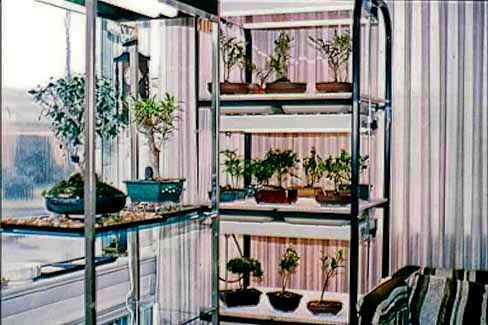
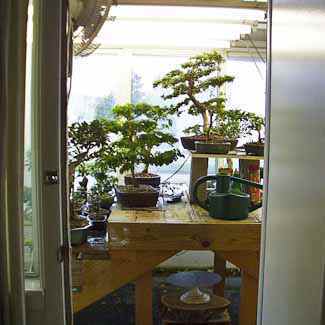
The above is a night view looking into the green house. Note some of the tools to the left of the door. Below is a view from the living room into the green house.
Considerations on greehouse functioning Temperature Temperatures in the greenhouse run from 100 in the summer to a minimum of 60F in the winter. To keep the cold air from entering the greenhouse from between the spaces in the wooden decking, I had a piece of indoor/outdoor carpeting installed and sealed around the edges of the room. This worked fine for about three years, but in 2004 I found that the rug was remaining saturated and was not drying out between waterings. In 2006, we removed the old rug and I was quite surprised that the deck was in perfect condition. That was due to the fact that the deck had been originally treated with Thompson’s Sealer. We again treated the wooden deck with the sealer and used spray liquid foam where the deck and the house met. The foam process sealed the area where cold air would come up along the edge of the deck. Then we installed new indoor-outdoor carpeting. Lighting
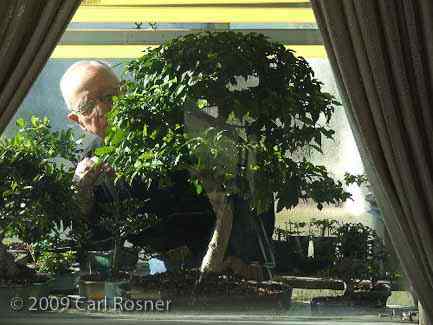
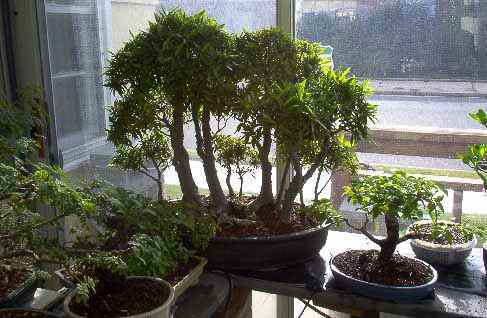
Humidification Even at 60% humidity will form on many surfaces in the greenhouse.The original Holmes humidifier required changing the soft filter several times a season, plus adding chemicals to keep the unit clean and to prevent mold build-up. I replaced the humidifier in January 2004. The new humidifier, model 34351, by Hunter with an adjustable humidistat with a capacity of several gallons of water was obtained through Charlies Greenhouse. If the water tank runs out of water, it has an automatic shut off switch. The filter is of the permanent type and can be cleaned easily with vinegar and water. It requires filling about once a day and the see-through tank makes it easy to know when the tank requires refilling. The Hunter humidifier is far superior and requires a minimal amount of cleaning with vinegar. No chemicals are required! Most of my trees are on the south side of the steps due to the sun’s warming rays shining in through the Southern exposure sliding door and window. There is no over hang on the angled roof on that side of the building. By having the trees situated on the different levels of the steps, I am able to reach over to prune, and check for their watering needs. Even that becomes a stretch for me to reach some of the trees. I, therefore, move my trees around for my convenience. I have a few trees, such as the Serissa, that like a cooler temperature, and they are kept on the north side of the stairs. Subsequently, I wintered my Serissa outdoors mulching them into the ground and found that they do even better than being kept in my greenhouse. Trees on the north side receive only fluorescent light and no direct warming sunlight. A few years back I changed the stair step display stand to make it more convenient for me. If you would check the picture from our living room into the tree house you will notice that the space under the “A” frame had a cross bar. This was my undoing, since I had to crawl under the cross bar in order to clean the rug of debris, leaves, and keep the rug as sanitary as possible.This meant that I had to don kneepads, and at some point I would be flat on my belly sweeping up the fallen debris. I did this about every three weeks, and each time I would find aching muscles I did not know existed within my aging frame! The fact that I worked out every day did not diminish these aching muscles. My daughter’s boy friend suggested that I create a “U” shape display and eliminate the “steps”. This made good sense, since I was not happy about the way the trees on the north side of the steps were developing.
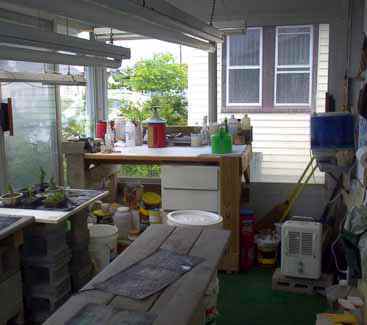
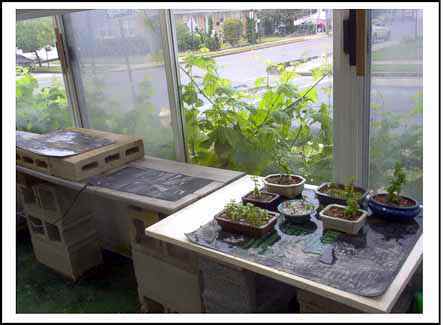
In the picture above on the right, you can see my worktable, as well as one of the milk house heaters on a cinder block, and above the heater on the shelf the Hunter humidifier. Please note the propagation mats that I use. About 30 of the 40-tree collection are strategically placed on the propagation mats.
I clean the Tree House floor about once a week with a Dust Buster and then wash out the filter. The “U” shape bench set-up has made my life much easier, and since the clean up is a snap, I do not suffer from aching muscles anymore. Periodically, I will move the trees around, not only to give more of the light coming in from the window areas, but also so that the trees receive equal light on all sides. Problems and Solutions In the coldest winter nights, with both heaters operating, the green house would stay above 60 degrees even though the outside temperature dropped into the teens. Unfortunately, during the day the heaters would not completely shut down during the day as temperatures rose. I choose to shut them down to save on the electric bill even if it was only the electric motor blowers that continued to run.I hope you can understand this requires my being fully a tentative to the needs of my trees and their environment. Since this green house was of my own design, I take full responsibility for its shortcomings. The rewards of watching my trees grow year round are well worth the efforts!
Watering and Humidity The watering of my trees is an easy chore, since the indoor carpet on the floor absorbs the water, and it helps keep the humidity in the 50 to 60 percent range. Without the high humidity my trees suffered when I had them in the living room. The drawback of the high humidity is that the ceiling, walls, and windows are constantly wet and drip water. A green mold is not uncommon, especially at the floor level. The trees thrive in this environment. But would be a disaster to the furniture in your home if the humidity were kept this high. It is common knowledge that all trees thrive when they are exposed to the wind, the sun, and the fresh air. During the warm part of the growing season, I try my best to move my trees outdoors to take advantage of these outdoor elements. I must admit that with the screens in place the trees that stay in the green house do fairly well, since they are exposed to fresh air and wind. They still receive some sunlight through the screens and the skylights! Many trees develop sun burned leaves when moving trees to the outdoors. I try to gradually move them out into the shade; unfortunately there isn’t that much shade on my front deck. The move is supposed to be gradual to allow the trees to adjust to the much stronger light of the outdoors. First, the gradual moves to the shade, and eventually into full sun. However, the trees that do suffer sunburned leaves seem to drop the sunburned leaves and new leaves develop without any apparent damage.When the majority of my trees are moved out doors in the spring, the windows are left opened into the fall. The sliding door and window areas are equipped with sliding screens. Most of the signs of mold disappear by fall, and that is when I clean up the green house. There are a few trees that stay in the tree house during the growing season, mostly for security reasons, since I am on a corner of a busy street in a summer resort. In the first few years, I did not put my more valuable trees outdoors. After losing several trees (with good pots), I had movement sensor lights installed, and that stopped the thievery. Baobab (Adansonia digitata) Black Olive (Bucida spinosa) Bougainvillea spectabilis as well as glabra Brazilian Rain Tree (Pithecellobium tortum) Buttonwood (Conocarpus erectus) Ficus benjamina Ficus salicaria(salicifolia) Ficus microcarpaFicus benjamina v. Wiandi Fukien Tea (Ehretia microphylla) Pineapple Guava (Feijoa sellowiana Berg) Olive (Olea europea) Serissa (Serissa foetida) Schefflera aboricola Texas Ebony (Pithecellobium flexicaule). The first year the greenhouse was built, my trees suffered attacks of spider mites and wooly aphids. Fortunately, the installation of the oscillating fan dropped the pest population down to almost zero. Natal plum (Carissa grandiflora) and English Ivy (Hedera helix) are the only two trees that seemed not to flourish in the environment of my humid green house. My reason for eliminating them from my collection was due to the fact that both suffered infestation of scale. I just couldn’t seem to keep these plants healthy. In my opinion the leaves of both of these plants grew in tight internode clusters and did not allow enough air circulation in and around the leaves plus it is possible they received too much humidity! I only use the alcohol and soap solution. Scale was killed off many times, but they just kept coming back. It was a battle that I didn’t think was worth it. I gave the two Natal plums to a friend and he is raising them as houseplants and they do quite well. Their internodes are much farther apart than when I had them. The fates of the English Ivy are unknown, since they were all sold. Summary In summing up the move from our living room to the enclosed deck-green house, the experience has been quite illuminating. I learned a lot, and would suggest anyone contemplating an enclosure of a deck to consider a ready-made green house with automatic temperature controlled heaters, windows and thermostats as these will make the care of the plants and the room itself much easier and more automatic.I would also suggest that the deck be replaced with the new plastic type decking. I imagine that in the future the wooden deck of my greenhouse will have to be replaced, since the constant watering will eventually rot out the wood! The trees you choose for your living room, no doubt, will have to be different than the ones you grow in a green house. Just remember that the lighting in your living room or in the greenhouse should be on for at least 16 to 18 hours a day. The need for moving air to keep the pest population down has to be considered, and lastly the need for humidity for certain trees is a must.
Need I say more???
|
||||||||||||||||||
|
All photos © Carl Rosner
|
![]()
![]()
All Rights Reserved © 2009 Jerry Meislik
![]()